Week 12 – blog task
Write up what you have learnt about editing from this weeks seminars in your process book blog.
This week I will mainly learn to use color in the later stage. I learn through class, and then give an example of my own practice;
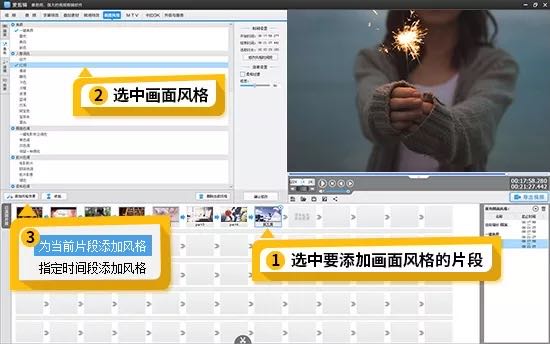
Click the “Video” tab at the top of the main interface of iClip. In the “Added Clips” at the bottom of the panel, click the “Double-click here to add video” area, and then import the video in the pop-up file selection box. At the same time, iChang also supports dragging the video directly to the “Added Clips” area list.
- Color the video through the “Picture Style” function
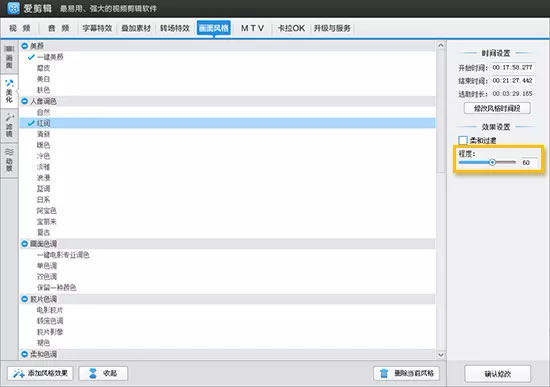
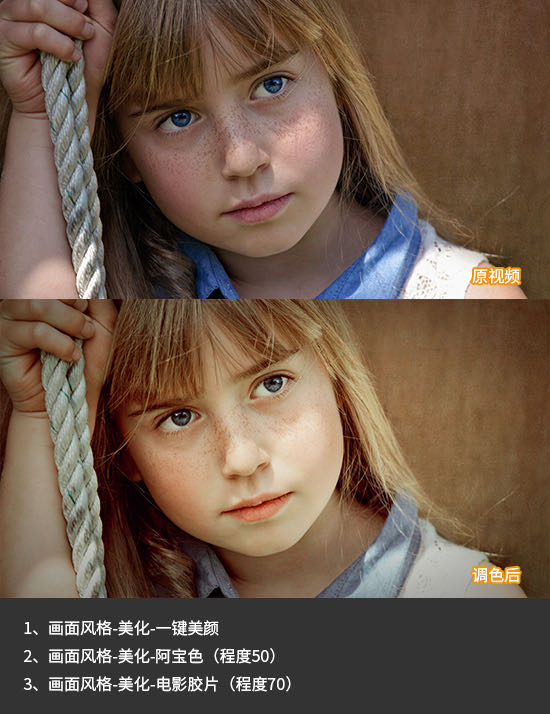
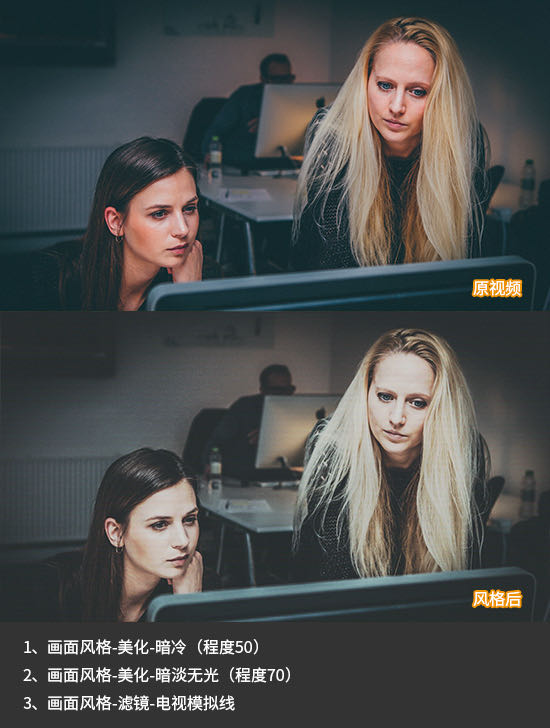
Combined with the “Super Scissor Hand” function, after finishing the video editing, click the “Picture Style” tab at the top and switch to “Beautify” in the left column. In the “beautify” panel, we can see various one-click applications such as “dermabrasion”, “whitening”, “skin tone”, “portrait tone”, “picture tone”, “film tone”, and “retro tone” Toning and beautifying functions, and through the “degree” function of various color toning schemes, to achieve more detailed and heavy color schemes. Double-click the option to be applied in the list, and set the duration of the picture style in the pop-up “Select Style Time Period”. For more basic operations of adding, deleting, modifying, and indexing on the “Picture Style” tab, please check. 3. Combined use of “picture”, “filter” and “motion scene” functions
In addition to color adjustment, the “Picture Style” function also supports cropping video images, rotating videos, flipping videos, applying various blur effects, glare effects, rain water splash effects, ripple effects, vibration visual effects (that is, camera shake), TV Wall special effects, glass special effects, and various cool dynamic special effects such as ink smudges, burning fires, flying petals, clouds and mists, and sparkling water. In the “Picture Style” panel, click the corresponding left column, double-click the effect item to be applied, and set the duration in the pop-up “Select Style Time Period” dialog box. Fourth, export HD video
After applying the special effects appropriately to make the video more beautiful and blockbusters, you can export it with one click. When exporting the video, if the original film has sufficient definition, remember to choose to export the MP4 or AVI format of 720P or 1080P, and adjust the bit rate to above 3500kbps. Don’t cause the image quality due to improper settings.
Continue to shoot/record your project and now try to complete a rough cut of your project using Premiere/Audition. Record and reflect on your progress on your blog.
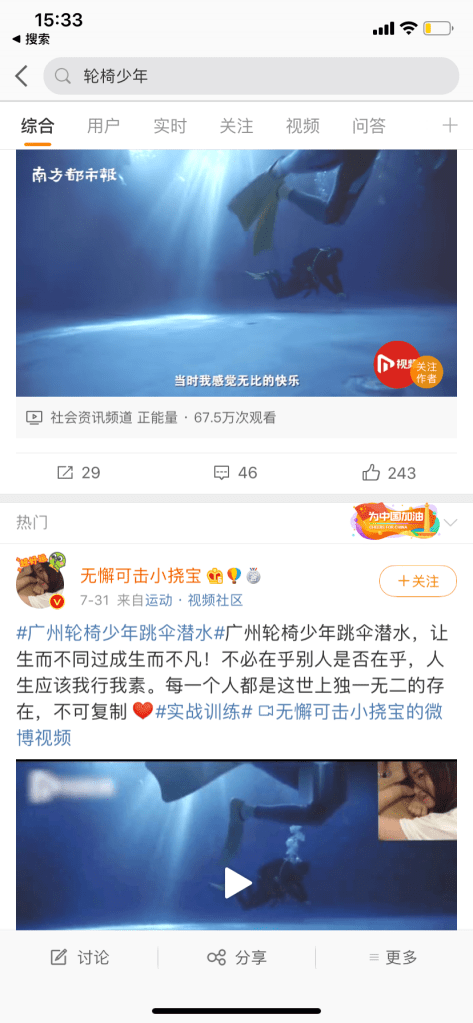
This week I accompany the interviewee to record with some Chinese social media. I learned more stories about wheelchairs. Including me, I also participated in the filming of a program of the China Southern News Agency. As a friend of wheelchair teenagers, I discussed how important the construction of barrier-free access for the disabled is to everyone who needs to use a wheelchair. The photos below are some videos posted on Chinese social media, which have more than 1 million views in China
 jing
jing 